The new release of Altium Designer 22.6 brings important schematic capture improvements that further align Altium Designer with the needs of modern design engineers. This month’s announcement focuses on new schematic capture upgrades:
-
Multi-functional Pins – Many modern integrated circuits have multifunctional pins. Now users can program pin names into parts and select pin configuration directly in a schematic sheet.
-
More Support for Alternative Parts – Instead of being constrained to the same part across all channels in a multi-channel design, you can easily specify alternative parts in schematics when defining a variant international programmer day
-
Active Links in Text – Need to place a reference to another net or component in a schematic sheet? Now you don’t need to use the search through your schematics, you can place a clickable link directly in text to make navigation quick and easy.
To upgrade your AD22 to the newest version and take advantage of all available upgrades, navigate to the Updates page from the Extensions and Updates window. We’re always focused on improving the functionality and user experience of Altium Designer, giving users everything, they need to be productive and successful. Upgrade today to get access to the newest productivity features in Altium Designer.
Download Altium Full Version 22.6
Altium Designer 22.6
Shematic Capture Improvements
Custom Names for Multi-functional Pins
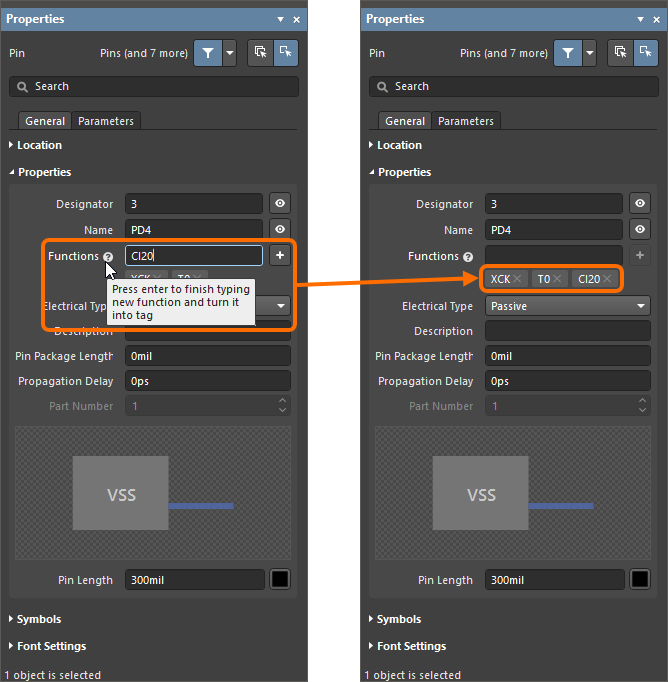
This feature allows for the custom naming of multi-functional pins. Use the new Functions field of the Pin mode of the Properties panel in a schematic library document to enter the desired custom name. After clicking Enter, the custom (alternate) name will display below the field as shown in the image below. There are no limitations for the field, and numbers and/or special characters (&, *, %, etc.,) can be used. All Font Settings for the custom name are the same as the original pin name.
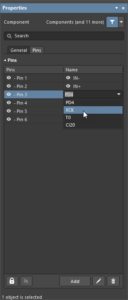
In the Component mode of the Properties panel in a schematic document, the custom names are displayed on the Pins tab.
Custom pin names can also be defined when creating a schematic symbol using the Symbol Wizard. When pin names entered in the Display Names column of the Symbol Wizard contain slashes (‘/‘), these names will be added as custom pin names to the pins of the generated symbol.
I/O), you can remove these extra pin names using the Pin mode of the Properties panel after creating the symbol.
Example of a pin name with slash characters in the Symbol Wizard. Hover the cursor over the image to see the properties of the generated symbol’s pin.
Display of pin names on schematic symbols can be managed by clicking on the name of a pin with custom names defined. In the pop-up window that opens, check the function names you would like to display on the schematic symbol. If no custom pin name is selected in the list, the default name will be shown.

Example of a pop-up menu for a pin with custom pin names. Hover the cursor over the image to see this pin after selecting some custom names.